

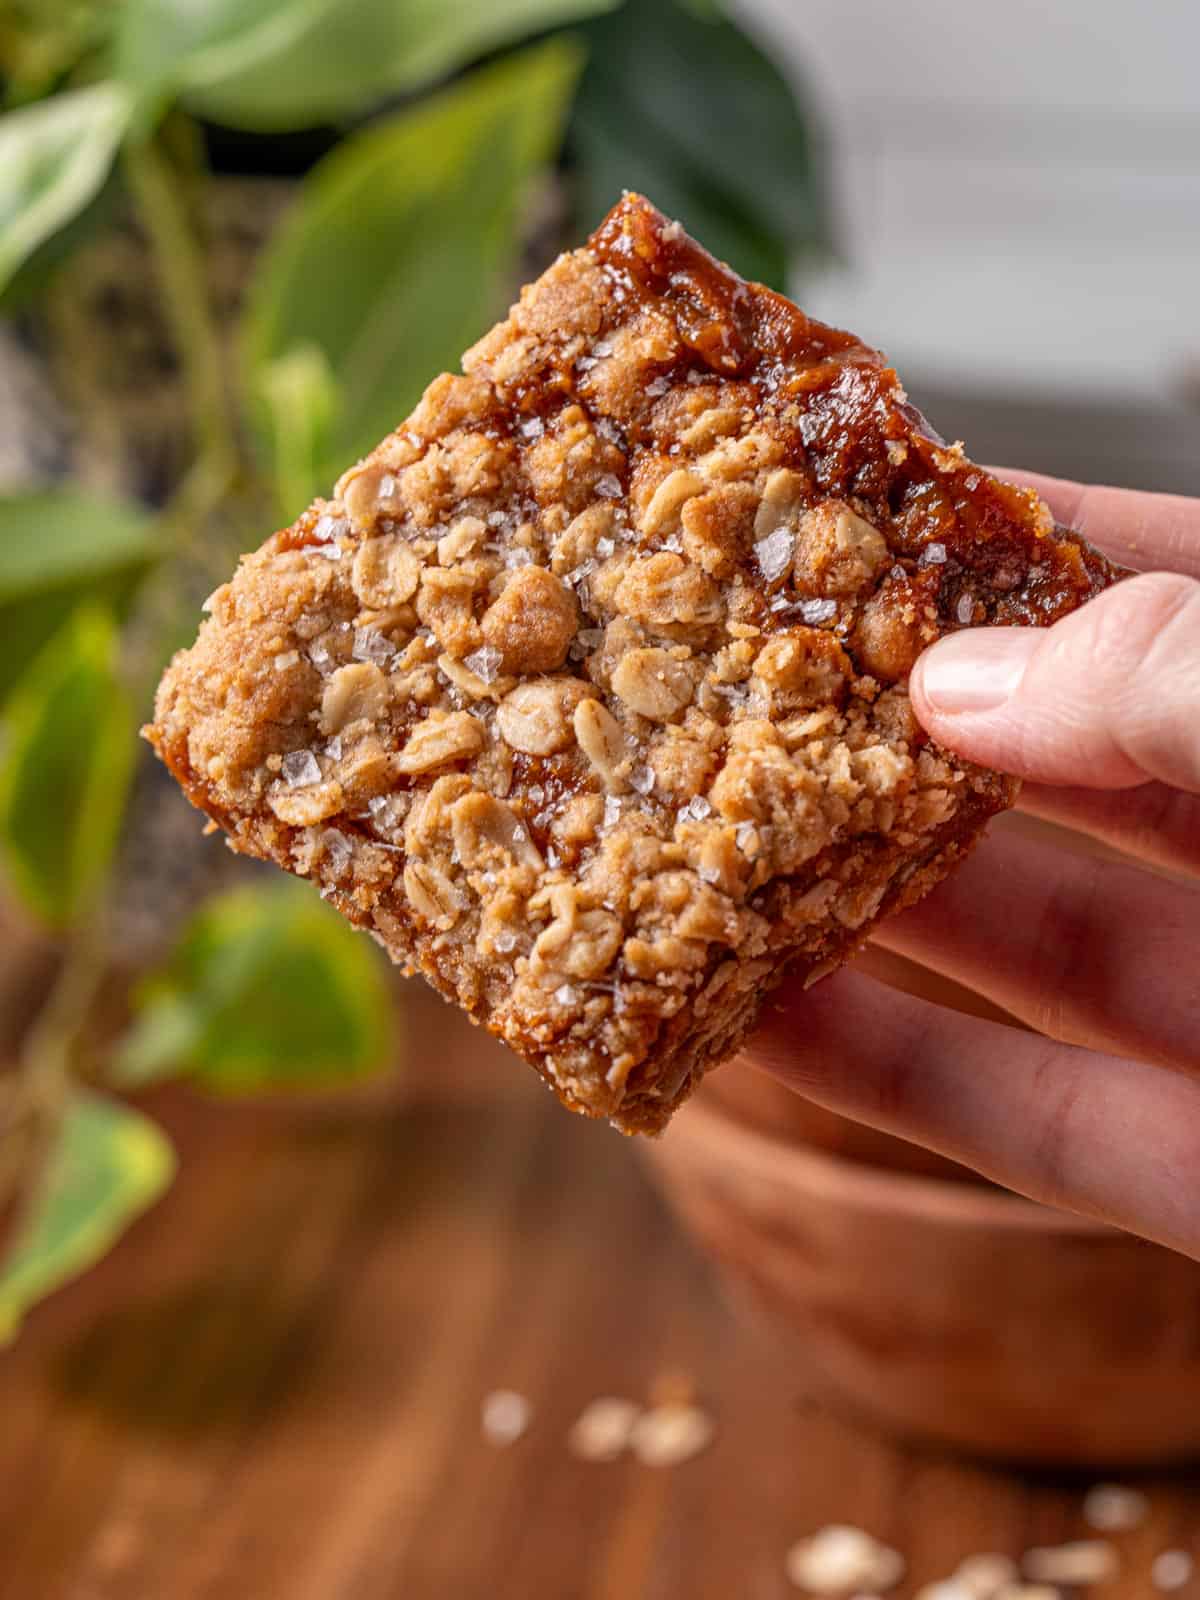
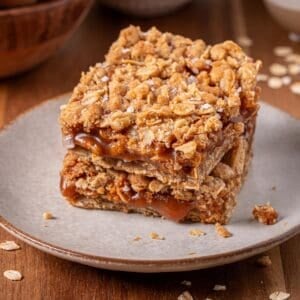
These caramel oat bars are everything you love about a buttery oat cookie, doubled, with a thick layer of homemade salted caramel right in the middle. You get buttery, chewy, crisp, gooey, sweet, and salty all in one bite! They’re also called caramel oatmeal bars, and this version is made without chocolate so the salted caramel really shines!
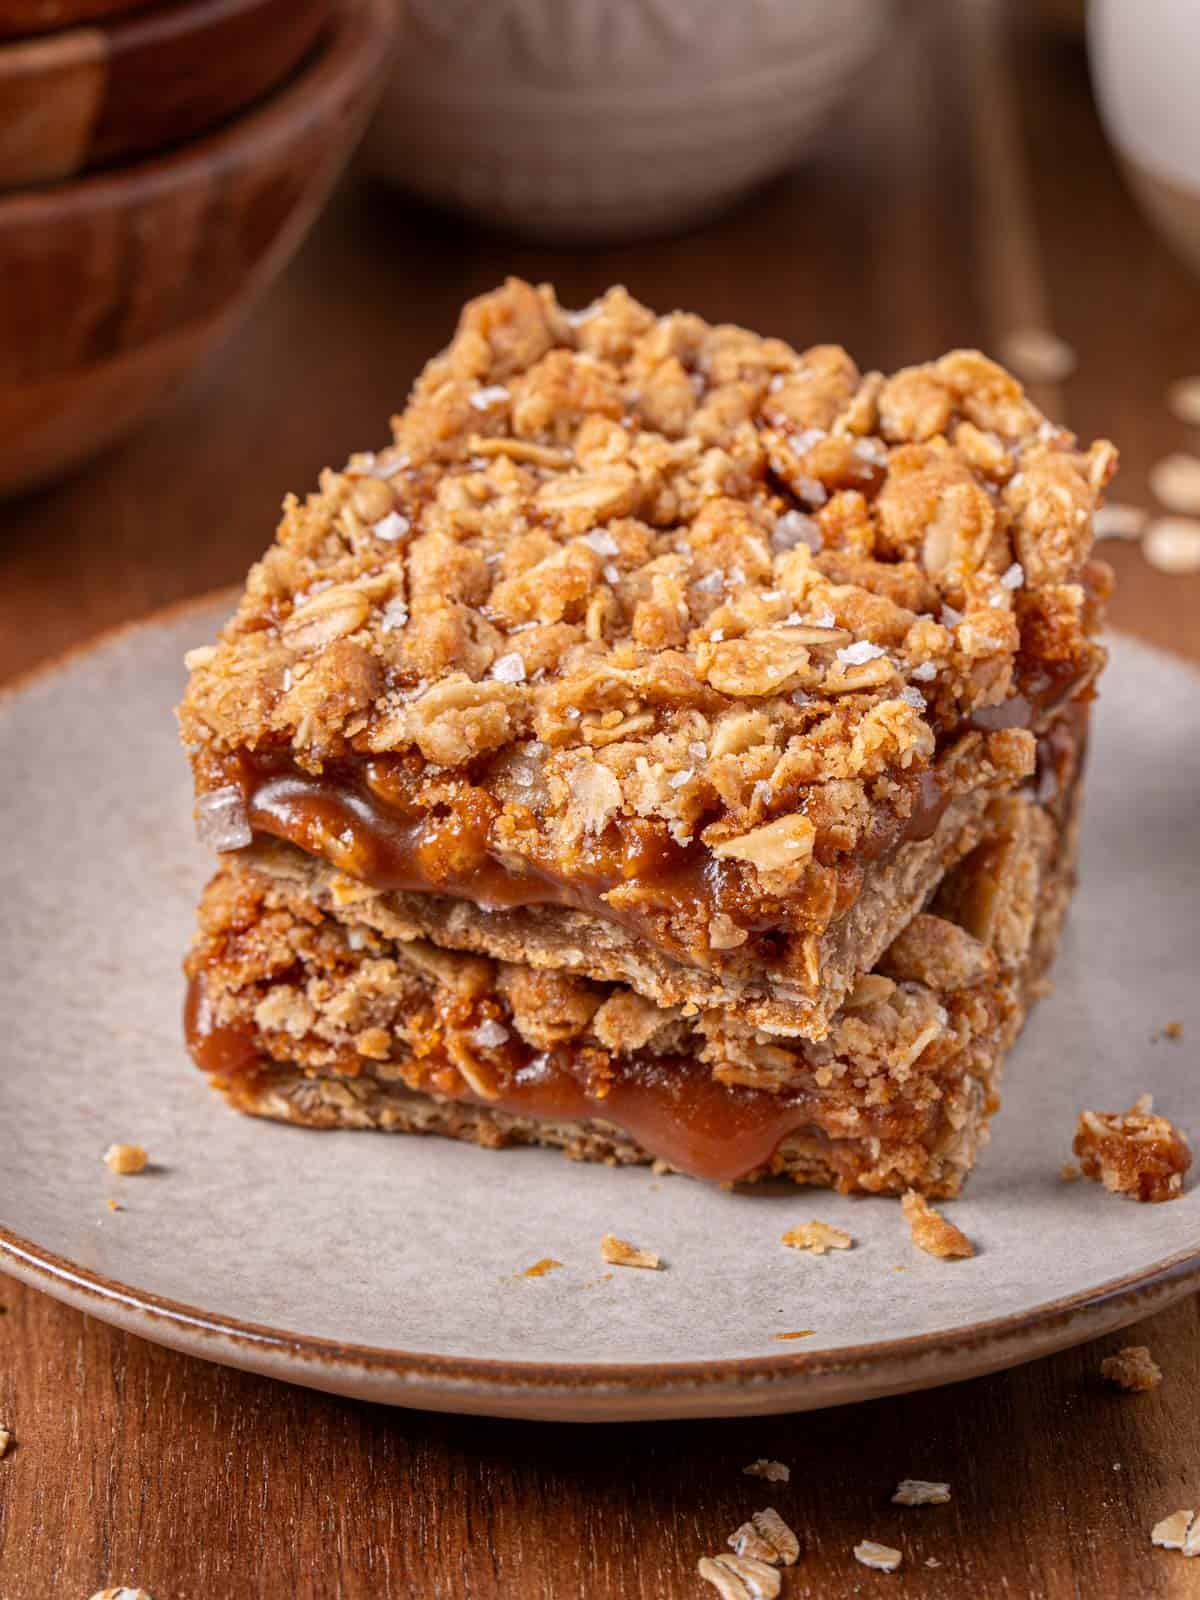
I love these caramel oat bars because they come together with simple pantry staples, but they taste like something from a bakery. They’re perfect for lunchboxes, bake sales, holiday cookie trays, or warmed up with a scoop of vanilla ice cream for an easy dessert!
If you love buttery bars, try my brown sugar bars and gooey pecan pie bars too!
Why You’ll Love These Caramel Oat Bars
- One dough, two layers: The same oat cookie mixture is used for both the base and the crumble topping, so there’s only one bowl to make and nothing complicated to assemble.
- Real salted caramel flavor: Homemade salted caramel tastes so much richer than condensed milk caramel. It’s buttery, deep, and has that perfect sweet and salty balance. Check out my post for my caramel sauce tips and tricks.
- Amazing textures: A chewy, buttery oat base, a soft gooey caramel center, and a crisp golden crumble top. And the chewy caramel edges? Fight everyone for a corner piece!
Baking Tips
- Using a kitchen scale is a total game changer for baking. It makes measuring ingredients super precise, so your recipe comes out perfect every single time. Plus, fewer measuring cups means less cleanup, and who doesn’t love that? Invest in one, and you’ll wonder how you ever baked without it!
- I absolutely love baking with fine kosher salt, it gives the perfect balance of flavor. Table salt, on the other hand, can be a bit too harsh, so if you're using it, be sure to cut the amount in half to avoid over salting your treats.
- Always check your oven temperature! Ovens can be sneaky, sometimes running hotter or cooler than what the dial says, and that can really affect how your baked goods turn out. For the most consistent results, I recommend using an oven thermometer to make sure your temps are spot on every time
Ingredients
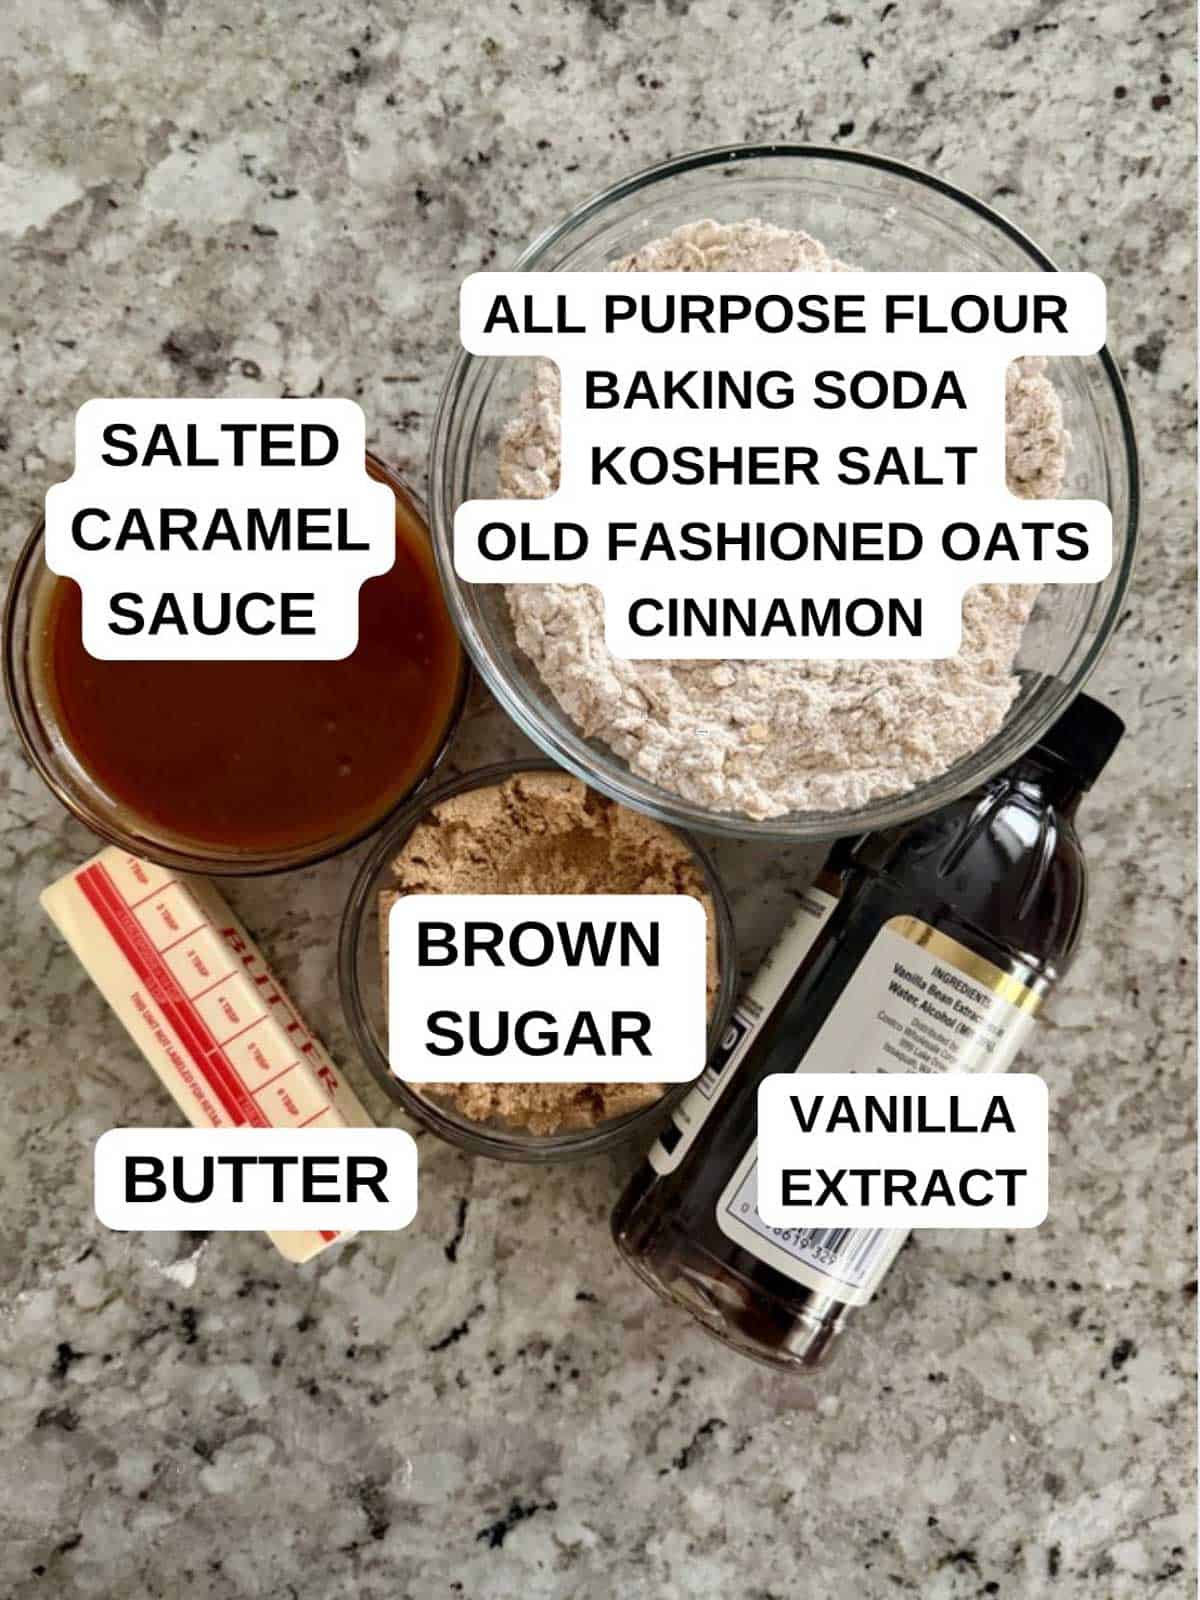
For the oat cookie base and topping:
- Rolled oats: Use old fashioned rolled oats, not quick oats or instant oats. Rolled oats hold their shape and give the bars that hearty, chewy texture and crisp crumble on top.
- All purpose flour: Flour gives the oat cookie layer structure so the bars hold together when you slice them. For the best results, weigh your flour or use the spoon and level method so you don’t pack in too much and end up with a dry, crumbly bar.
- Cinnamon: A little cinnamon adds warmth to the oat cookie layers.
- Vanilla extract: Vanilla adds a cozy bakery flavor to the oat layers.
- Brown sugar: Brown sugar adds moisture, chew, and a deep molasses flavor that plays perfectly with the caramel. Light or dark both work, dark will give a slightly richer flavor.
- Butter: Melted butter is what makes this taste like a buttery oat cookie. It binds the oats and flour together and helps the base and topping bake up golden.
- Baking soda: Just a little baking soda helps the oat cookie layers spread slightly and brown, giving you those crisp, golden edges. Make sure you’re using baking soda, not baking powder, they are not interchangeable here.
- Salt: Salt balances the sweetness and makes the butter and brown sugar flavor pop. I like fine kosher salt; if you’re using table salt, cut the amount in half.
For the homemade salted caramel:
- Sugar: Granulated sugar is melted and cooked until it turns a deep amber color. This is where all of that rich caramel flavor comes from.
- Lemon juice: A small splash of lemon juice helps prevent crystallization. The acid keeps the sugar from turning grainy as it cooks, so your caramel stays silky smooth. You won’t taste it at all!
- Butter: Butter adds richness and gives the caramel its smooth, glossy finish. It should not be cold, room tempeature is best so the caramel doesn't seize.
- Heavy cream: Heavy cream turns the cooked sugar into a thick, pourable caramel sauce. Use full fat heavy cream, not half and half or milk, or the caramel won’t set up properly between the oat layers. Make sure it is room temperature or warm.
- Vanilla: Pure vanilla extract rounds out the caramel flavor and makes it taste finished.
- Sea salt: Flaky sea salt is what makes this a salted caramel. It cuts the sweetness and makes every bite more addictive.
- Shortcut option: Short on time? You can melt wrapped caramels with the amount of cream the bag suggests until smooth and use that instead of homemade caramel.
See recipe card below for quantities.
How to Make Caramel Oat Bars
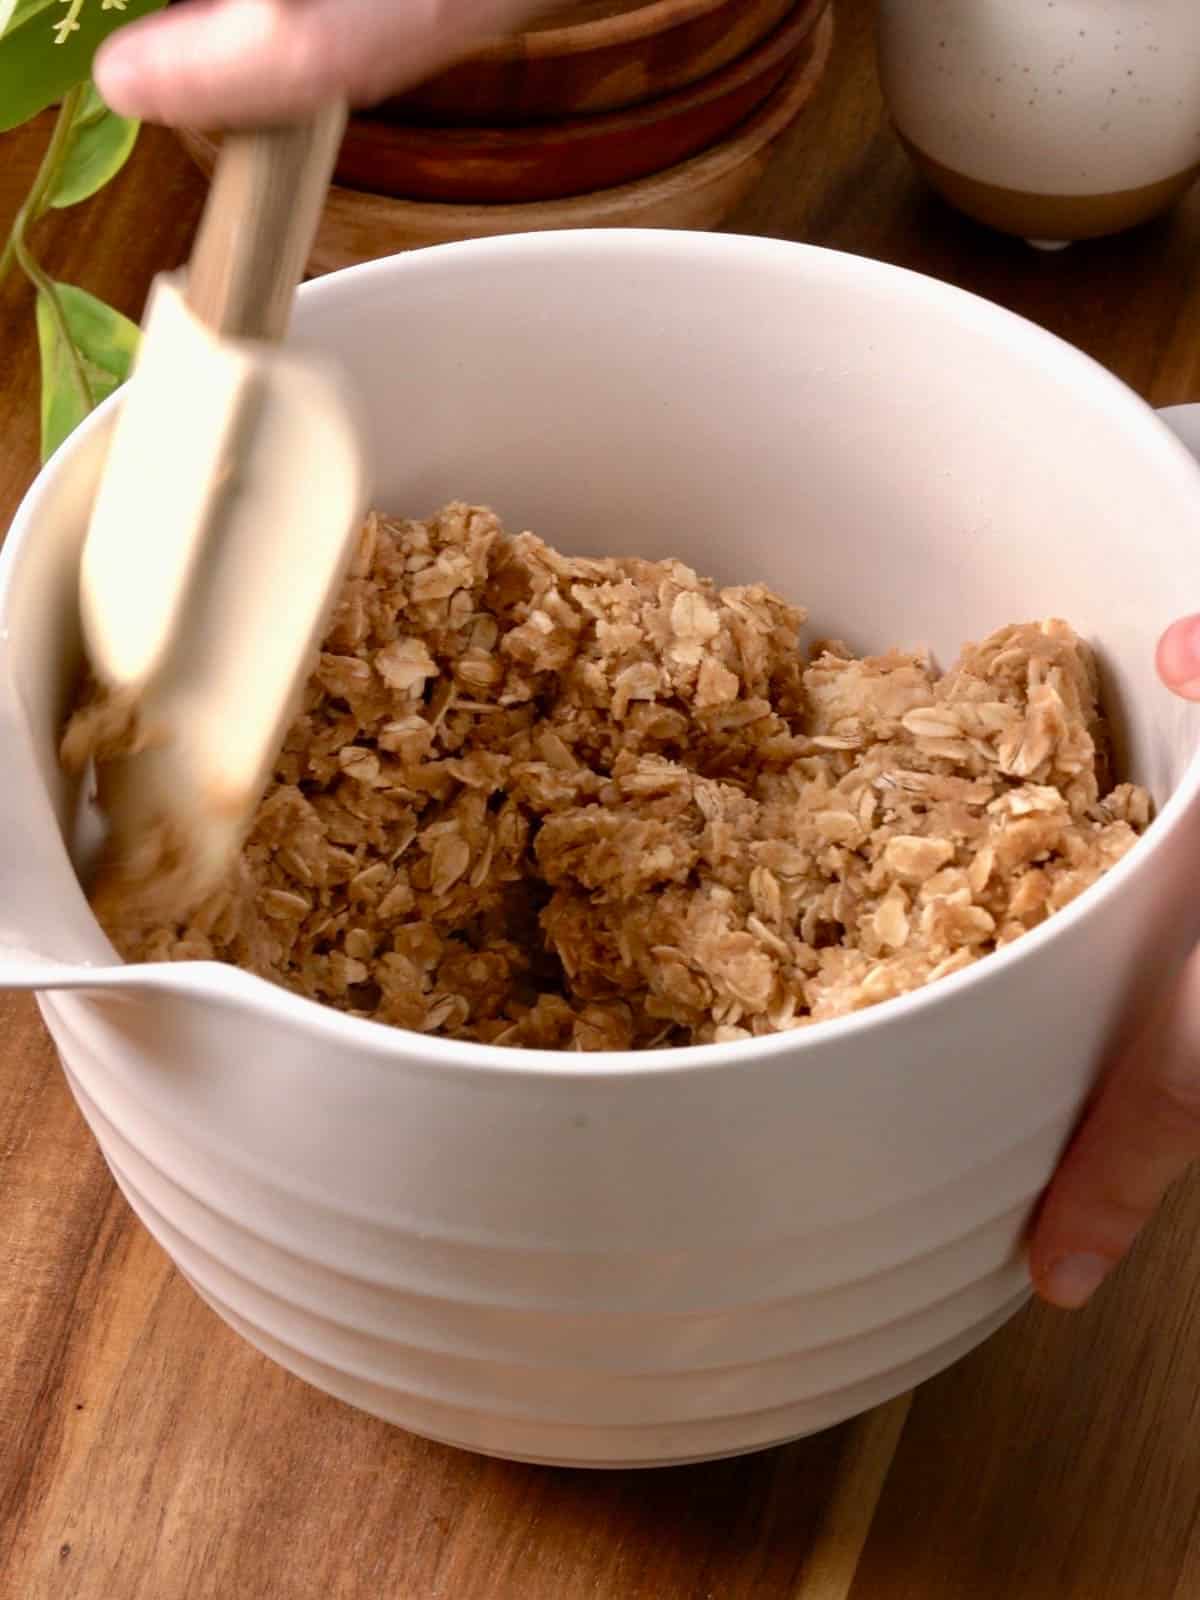
- Preheat the oven to 350°F. Line an 8x8-inch metal baking pan with parchment paper, letting it hang over all sides for easy removal later. Lightly spray the parchment with nonstick spray. In a large bowl, mix the melted butter, brown sugar, vanilla, cinnamon, and salt until well combined.
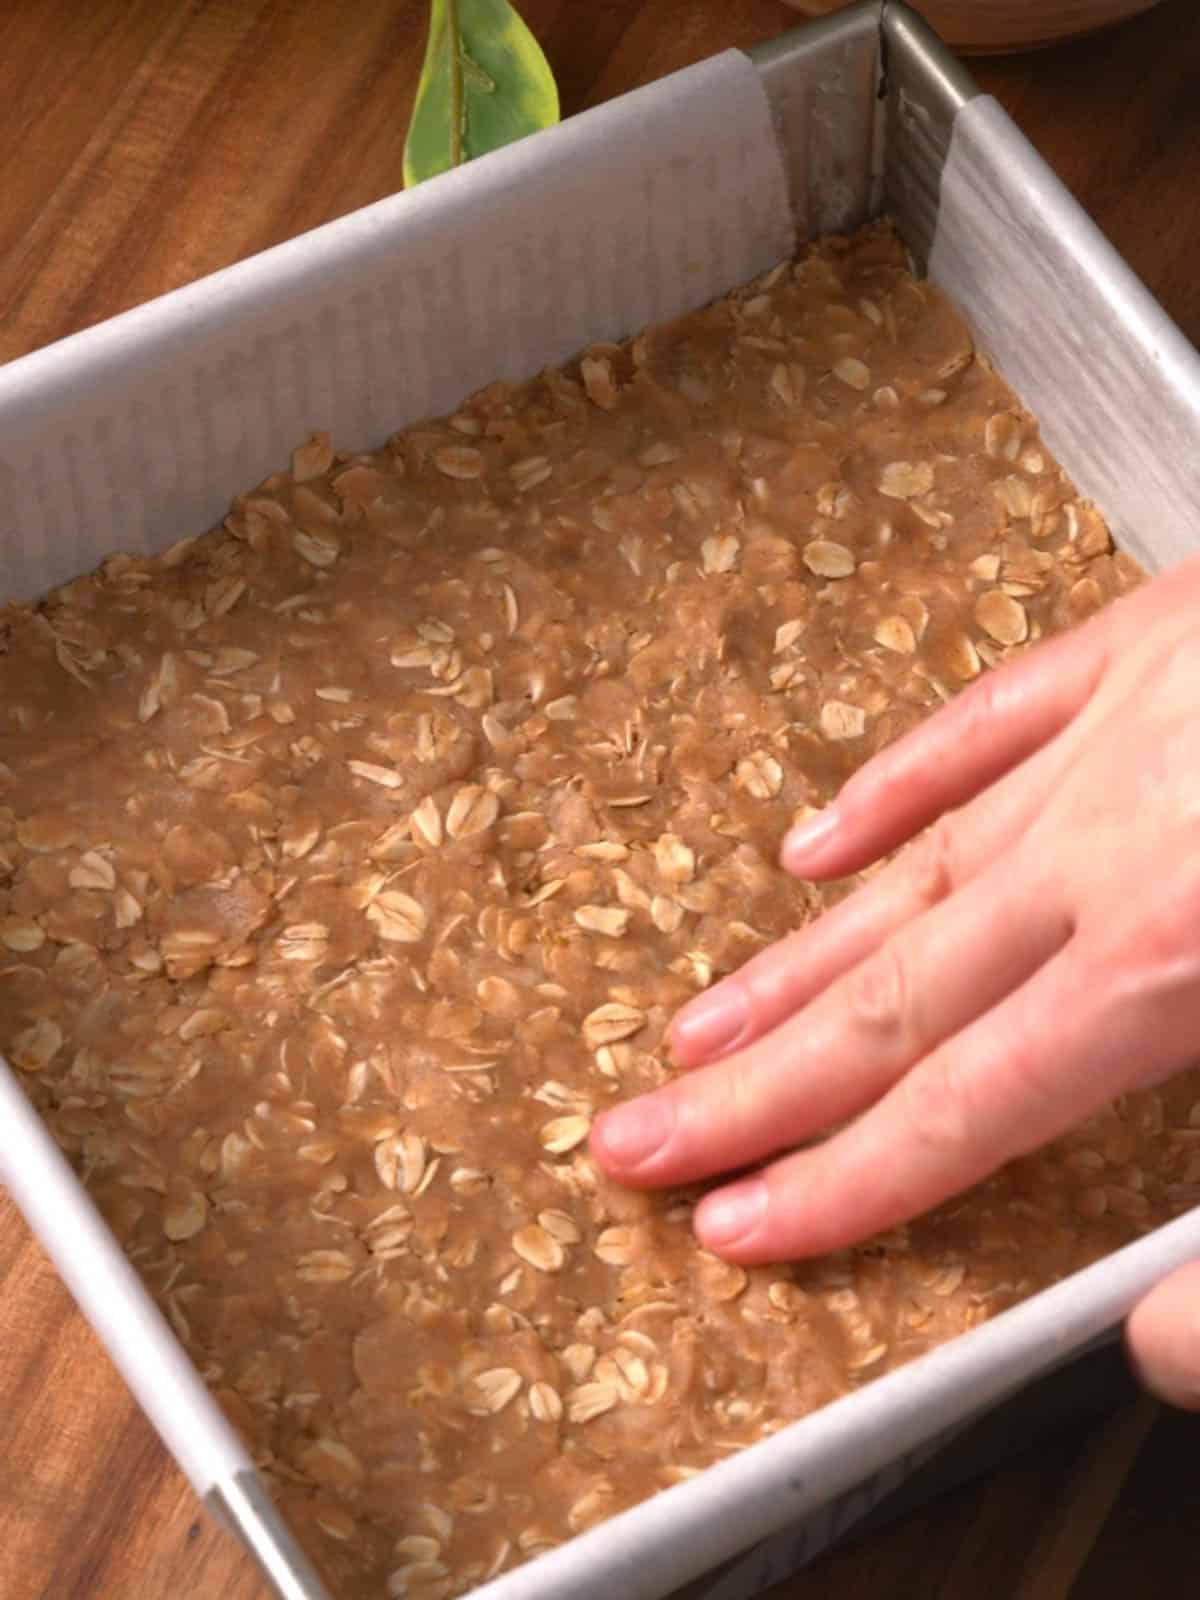
- In a separate bowl, whisk together the flour, baking soda, and oats. Add to the butter mixture and stir until everything is fully combined. Press half of the oat mixture firmly into the bottom of the prepared pan in an even layer. Bake for 10 minutes, then remove and set aside.
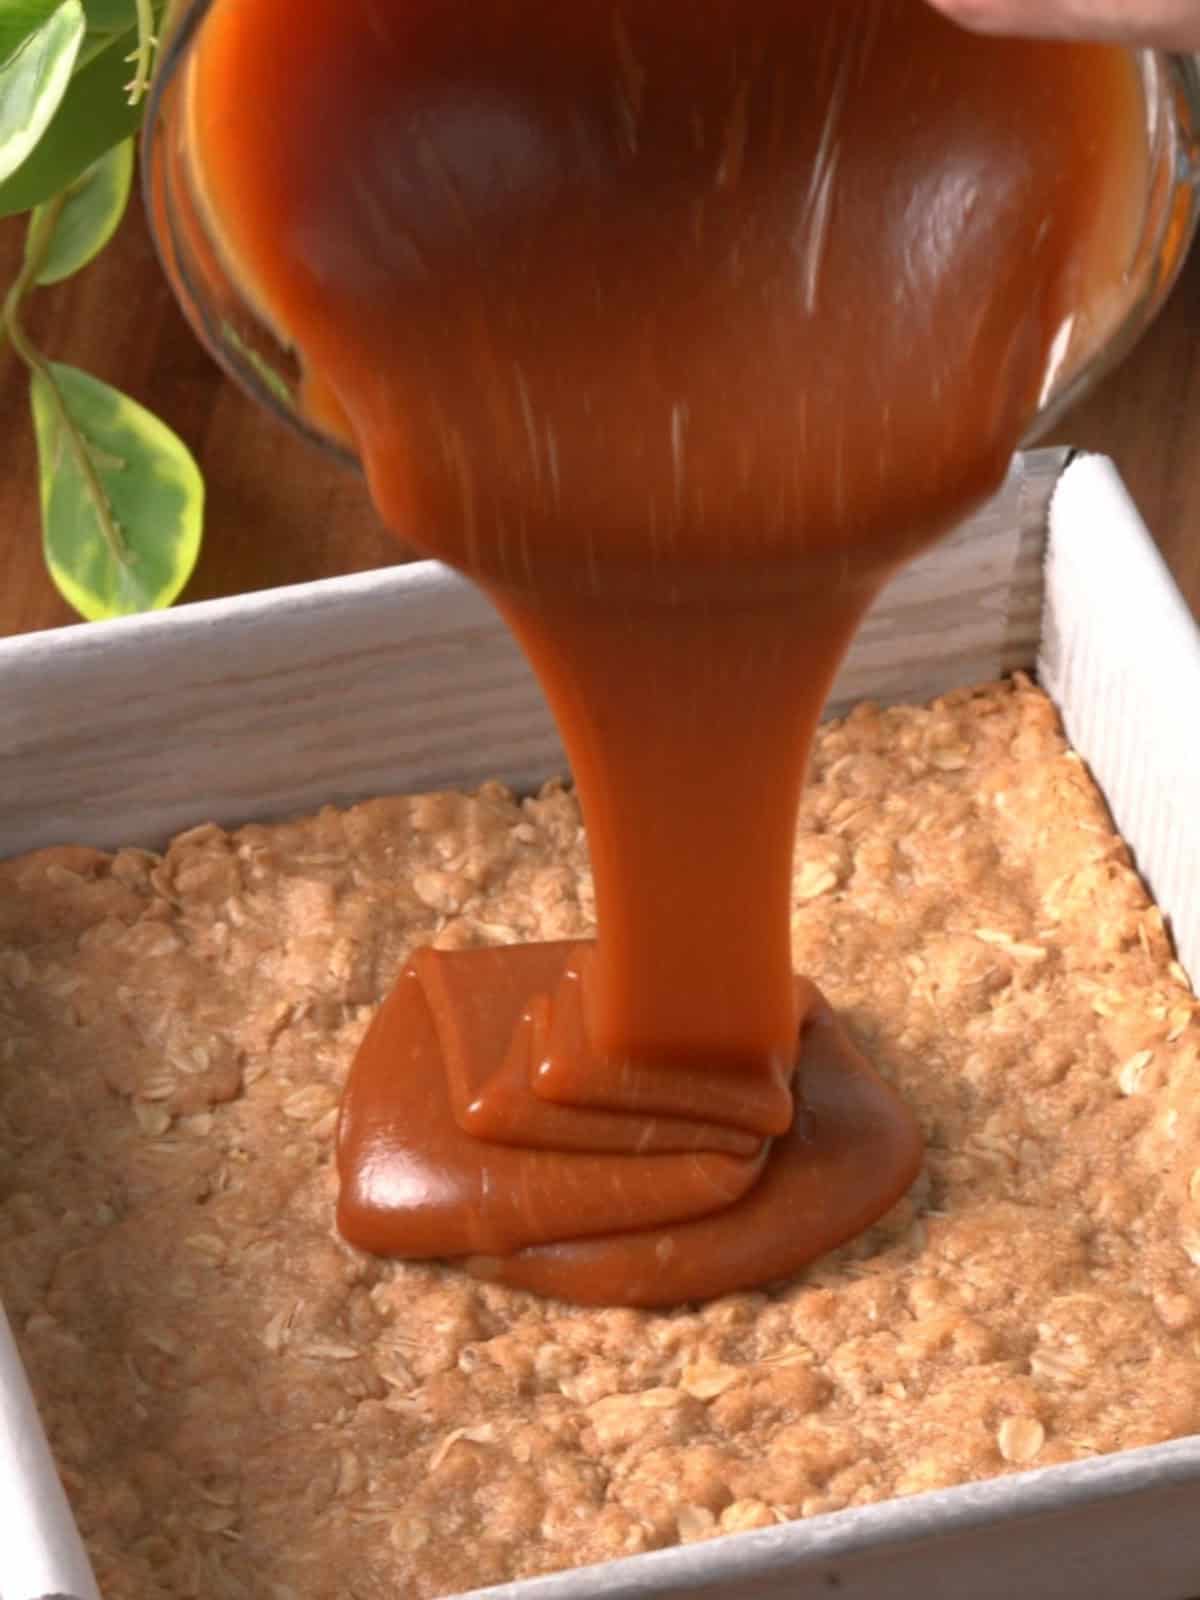
- Measure out 1 cup of caramel sauce and stir in 1 tablespoon plus 1 teaspoon of flour until smooth. Pour the caramel over the warm base and carefully spread it into an even layer (the pan will be hot).
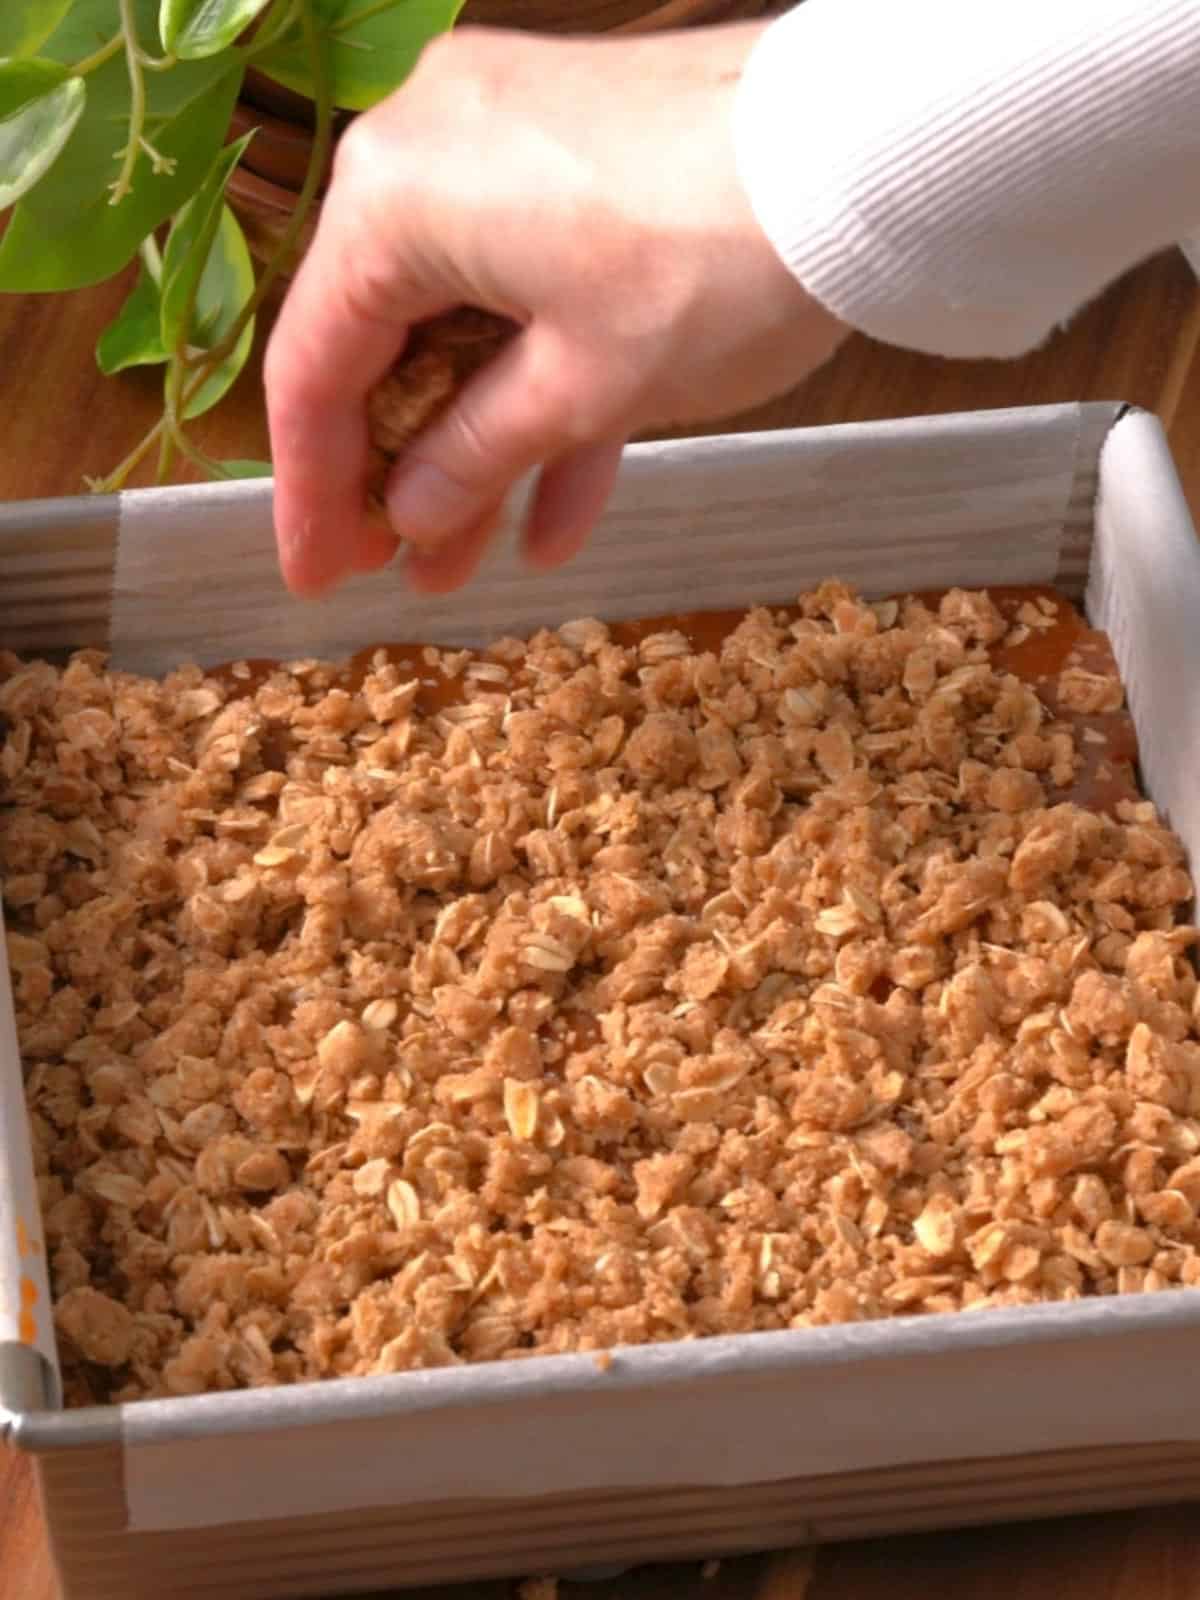
- Sprinkle the remaining oat mixture evenly over the caramel. Bake for 18 minutes, covering loosely with foil if the top starts browning too quickly. Remove from the oven. The center will look very liquidy, but it will set as it cools on the counter. Let it cool for a few hours, you can also refrigerate after it cools down a bit.
Hint: If the top is browning too much just place a piece of foil over the top!
Pro Tips
- Make the caramel first: Let your salted caramel cool and thicken before you assemble the bars. Warm, thin caramel will soak into the base and can make the bars runny. You want it thick but still spreadable.
- Mix caramel and flour together: This is a must! It helps thicken the caramel and it wont leak out everywhere after you slice into bars.
- Cook the caramel to a deep amber: Don’t pull the sugar too early. A pale caramel tastes mostly sweet, while a deep amber caramel gives you that rich, slightly toasty salted caramel flavor.
- Warm your cream: Adding warm cream to the hot sugar helps prevent the caramel from seizing up. It will still bubble up a lot, so use a pot with tall sides.
- Press the base firmly: Pack just over half of the oat mixture firmly into the lined pan. A compact base holds together much better when slicing.
- Pre bake the base: Baking the bottom oat layer before adding the caramel keeps it from getting soggy and gives you a sturdy, chewy cookie base.
- Leave a small border: Spread the caramel almost to the edges, leaving about a ¼ inch border. This keeps the caramel from burning against the pan and gives you those amazing chewy caramel edges.
- Watch for over browning: If the top is getting too dark before the bars are done, lay a piece of foil loosely over the pan and keep baking.
- Chill before slicing: This is the hardest part! Let the bars cool completely, then chill for at least 2 hours. The caramel firms up and you get clean, beautiful squares.
- Use a sharp knife: A sharp chef’s knife gives the cleanest cut. Wiping the blade between cuts helps too.
- Line the pan with parchment: Make sure to line the pan both ways and spray with nonstick spray. Leave some overhang on the sides so you can lift the whole slab out easily before slicing.
Variations
- Chocolate drizzle: Drizzle melted dark or milk chocolate over the top once the bars have cooled for chocolate caramel oat bars.
- Add nuts: Sprinkle chopped pecans or walnuts over the crumble topping before baking for extra crunch.
- Add coconut: Top the caramel with shredded coconut, make it toasted for more flavor.
- Make them carmelitas: Scatter ½ cup chocolate chips over the caramel layer before adding the crumble topping.
- Extra salty: Sprinkle a little flaky sea salt over the top right after baking.
- Make it a dessert: Warm a square slightly and serve it with vanilla ice cream, whipped cream, or a drizzle of extra salted caramel.
Storage
Room temperature: Store the caramel oat bars in an airtight container at room temperature for up to 2 to 3 days. Layer parchment paper between the bars so they don’t stick together.
Refrigerator: Store in an airtight container in the fridge for up to 1 week. The caramel stays firmer when chilled, which many people love. Let them sit out for 10 minutes before eating for a softer, chewier caramel.
Freezer: These bars are freezer-friendly! Cut them into squares, wrap individually or layer with parchment in an airtight container, and freeze for up to 3 months. Thaw in the refrigerator or at room temperature before serving.
Homemade salted caramel: If you make the caramel ahead of time, store it in an airtight jar in the refrigerator for up to 2 weeks. Gently warm it until it’s spreadable before using.
Caramel Oat Bars FAQs
No! Homemade salted caramel tastes the richest, but you can use a thick, high quality store bought caramel sauce (not ice cream topping) or melt wrapped caramels with a splash of heavy cream until smooth.
I don't recommend it, rolled oats are much better here. Quick oats are cut smaller and absorb more liquid, so your bars will be softer and more cake like, and you’ll lose that chewy, crisp oat cookie texture.
Usually it’s because the caramel wasn’t cooked long enough or was too warm when it was spread. Make sure your caramel is cooked to a deep amber and thick enough to coat a spoon, and let it cool before assembling. Chilling the bars completely before slicing also helps the caramel set.
Crumbly bars usually mean usually means too much flour or not enough butter. Weigh the flour if you can, make sure the oat mixture looks like damp sand that holds together when squeezed, and press the base firmly into the pan.
Absolutely. These actually taste best the day after baking once the caramel has fully set and the flavors have had time to come together. That makes them perfect for parties and holidays.
A 8X8 inch square pan works perfectly and gives you nice, thick bars. Make sure your pan is metal! Glass isn't great for baking.
Yes, use certified gluten-free rolled oats and swap the all-purpose flour for a 1:1 gluten-free baking flour blend.
Yes! Sprinkle chocolate chips over the caramel before adding the oat crumble to make carmelitas.
This recipe is made for caramel sauce, not sweetened condensed milk. Homemade salted caramel gives the richest flavor, but a thick, high quality store bought caramel sauce works too.
More Sweet Treats
Looking for other recipes like this? Try these:


📖 Recipe
Caramel Oat Bars
Equipment
- 8X8 metal baking pan
- Parchment Paper
- Medium Saucepan if making homemade caramel sauce
Ingredients
Salted Caramel Sauce (can use high quality store bought) do not use ice cream topping
- 1 cup (200 grams) granulated sugar
- ¼ cup (60 grams) water
- ¼ teaspoon lemon juice
- ½ cup (110 grams) heavy cream room temperature, 36% milk fat
- 5 tablespoons unsalted butter room temperature
- 1 teaspoon vanilla extract
- 1 teaspoon sea salt
Oat Layer
- 12 tablespoons (169 grams) unsalted butter melted
- ¾ cup brown sugar, packed
- 1 teaspoon vanilla extract
- ¾ teaspoon cinnamon
- ½ teaspoon fine kosher salt
- ¾ teaspoon baking soda
- 1 and ½ cups (152 grams) old fashioned oats do not use quick
- 1 and ¾ cups (220 grams) all purpose flour *if not weighing use the fluff and spoon method, see notes
Filling
- 1 cup caramel sauce mixed with 1 tablespoon plus 1 teaspoon all purpose flour
Instructions
Salted Caramel
- Ensure the unsalted butter and heavy cream are at room temperature. Measure out all ingredients and have them ready.
- In a heavy bottomed saucepan, pour the water into the pan and then pour the sugar on top avoiding the sides, and then add ¼ teaspoon lemon juice. Stir gently to moisten the sugar, but do not stir once it begins heating.
- Place the saucepan over medium high heat. Allow the mixture to come to a boil without stirring. Watch closely as it cooks.
- Continue heating until the sugar mixture turns a deep amber color. You can gently swirl the pan to move the caramel around and ensure even coloring, but avoid stirring. This process should take around 8-10 minutes. Do not let it darken too much, as it can taste burnt.
- Once the caramel reaches the desired color, immediately remove the saucepan from the heat.
- I like to wear an oven mitt to protect my hand from the steam. Carefully add 5 tablespoons of room temperature unsalted butter to the caramel. Stir gently until fully incorporated. Then, slowly pour in ½ cup of room temperature heavy cream, stirring continuously. The mixture will bubble up; keep stirring until smooth.
- Stir in 1 teaspoon of vanilla extract and 1 teaspoon of sea salt. Mix until well combined. set aside and make sure its cooled down before using.
Oat Layer
- Preheat the oven to 350°F. Line an 8x8-inch metal baking pan with parchment paper, letting it hang over all sides for easy removal later. Lightly spray the parchment with nonstick spray.
- In a large bowl, mix the melted butter, brown sugar, vanilla, cinnamon, and salt until well combined.
- In a separate bowl, whisk together the flour, baking soda, and oats. Add to the butter mixture and stir until everything is fully combined.
- Press half of the oat mixture firmly into the bottom of the prepared pan in an even layer. Bake for 10 minutes, then remove and set aside.
- Measure out 1 cup of caramel sauce and stir in 1 tablespoon plus 1 teaspoon of flour until smooth.
- Pour the caramel over the warm base and carefully spread it into an even layer (the pan will be hot).
- Sprinkle the remaining oat mixture evenly over the caramel.
- Bake for 18 minutes, covering loosely with foil if the top starts browning too quickly.
- Remove from the oven. The center will look very liquidy, but it will set as it cools on the counter. Let it cool for a few hours, you can also refrigerate after it cools down a bit.
Notes
Room temperature: Store in an airtight container for up to 2 to 3 days, with parchment paper between the bars so they don’t stick. Refrigerator: Store in an airtight container for up to 1 week. Let them sit out for 10 minutes before eating for a softer caramel.
Freezer: Cut into squares, wrap individually or layer with parchment in an airtight container, and freeze for up to 3 months. Thaw in the refrigerator or at room temperature.
Make ahead caramel: Homemade salted caramel keeps in an airtight jar in the refrigerator for up to 2 weeks. Gently warm it until spreadable before using.



Leave a Reply